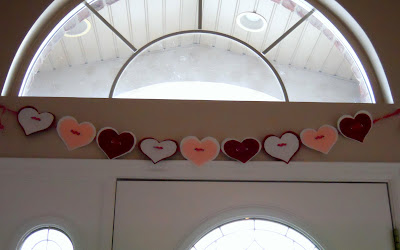
This Valentines Banner is so easy to make and there is no sewing involved!
Supplies needed:
Coordinating pieces of felt. I had approximately 1/4 yard of each color and I had plenty of left over fabric
3/16" eyelets - 18 total (I bought mine in the scrap booking section at JoAnn's. You can use larger eyelets)
Heat-n-Bond (love this stuff!)
2 yards of ric rac or ribbon of your choice
Glue gun/stick
- Cut out two heart patterns. You will need one slightly larger than the other heart pattern. I used my Cricut to cut out my patterns. The larger heart is 4 & 1/2 inches and the smaller heart is 4 inches. (You can also use a cookie cutter as a guide for free-hand it!)
If you are paying close attention to the pictures and the numbered steps you will notice that I repeated steps 3 and 4. And steps 6 and 7 are switched. In my defense...I'm tired. My toddler woke up at 4am today. Yes, he is evil. Amen.
Okay, back to crafting...
- Pin each of the smaller hearts to the Heat-n-Bond and cut out 9 hearts.
- Iron each of the Heat-n-Bond heart cut-outs to the backs of each smaller heart.
- Peel off the paper backing and place the smaller pink hearts to a larger cream heart, the smaller red hearts to the larger cream hearts, and the smaller cream hearts to the larger red hearts. Iron all of the hearts together, according to the Heat-n-Bond instructions. (Does that make sense? Clear as mud?)
- Punch two holes about 1.5 inches apart in the center of the hearts. I used my Provo Craft Hole Punch and Eyelet Setter. (I love this thing, too!) If you do not have a hole punch and eyelet setter, you can just cut some small slits, instead.
- Set two eyelets in the holes then secure the back with your eyelet setter. Or use a hammer to hammer the backs of the eyelets flat.
- String the ric rac or ribbon through the eyelets of each heart, alternating the colors.
- Use a glue gun to hot glue the ric rac to the backs of the hearts. This will help stabilize the banner.
Tah Dah! You are finished! Enjoy your Valentines Day Banner!


.JPG)


So cute Jen! Can I just pay you to make one for me? :)
ReplyDeleteWhat a cute tutorial! It's hard to beat any project with felt and ric rack. I've added a link to your tutorial on my blog :)
ReplyDeleteCute! That would look cute on my fireplace, but that would mean I actually have to make it instead of oohh and aahh at yours. I'm with Becca, can you just make me one and I'll pay you?
ReplyDeleteThat is adorable! Thanks for the instructions!
ReplyDeleteEverything you do is so cute and perfect. I think I'll just come to your house and admire what you have and feel jealousy over your talent. Sound good?
ReplyDeleteNot sure where to post this but I wanted to ask if anyone has heard of National Clicks?
ReplyDeleteCan someone help me find it?
Overheard some co-workers talking about it all week but didn't have time to ask so I thought I would post it here to see if someone could help me out.
Seems to be getting alot of buzz right now.
Thanks